
How many times have you sat down at your computer to answer “just a few” emails and two hours later, you’re still glued to your computer trying to figure out how to respond?
Emailing is of course an element of running a blog for business, but what if you could cut way back on the amount of time it takes so that you can focus on what you do best…making delicious recipes and fun projects! Today I’m going to show you how to automate your email process by setting up canned responses in Gmail. What are canned responses? They are basically templates you store in gmail for the types of emails you frequently find yourself sending over and over again. Instead of having to dig in your Sent folder looking for past emails or having 10 half-written emails in your drafts, canned responses allows you to easily insert responses into emails.
I’ve been using canned responses in my blog and business for several years now and it’s life changing. So let’s get started!
Below are the types of emails I use canned responses for:
- Social Media Inquiry (if a brand on Instagram reaches out and wants to send product to feature)
- Image Usage Inquiry (a response when sites/bloggers ask if they can use my image on their site)
- Invoice Attached (sent for reoccurring work. Thanks brand, includes spot to insert invoice due date, etc.)
- Brand Inquiry If You Are Interested (includes link to my media kit)
- The “No Thank You” Brand Inquiry Response If You Aren’t Interested
- Contributorship Email (Simply list that the post is ready for them to review.)
- Pitch To A Brand
- Your Shipping Address for Brand Collaborations/Product Features
First, you need to Enable canned responses in your Gmail Account. These steps only need to be done now at the very beginning.
- Log Into Gmail.
- Click the Gear Icon in the top right > Settings
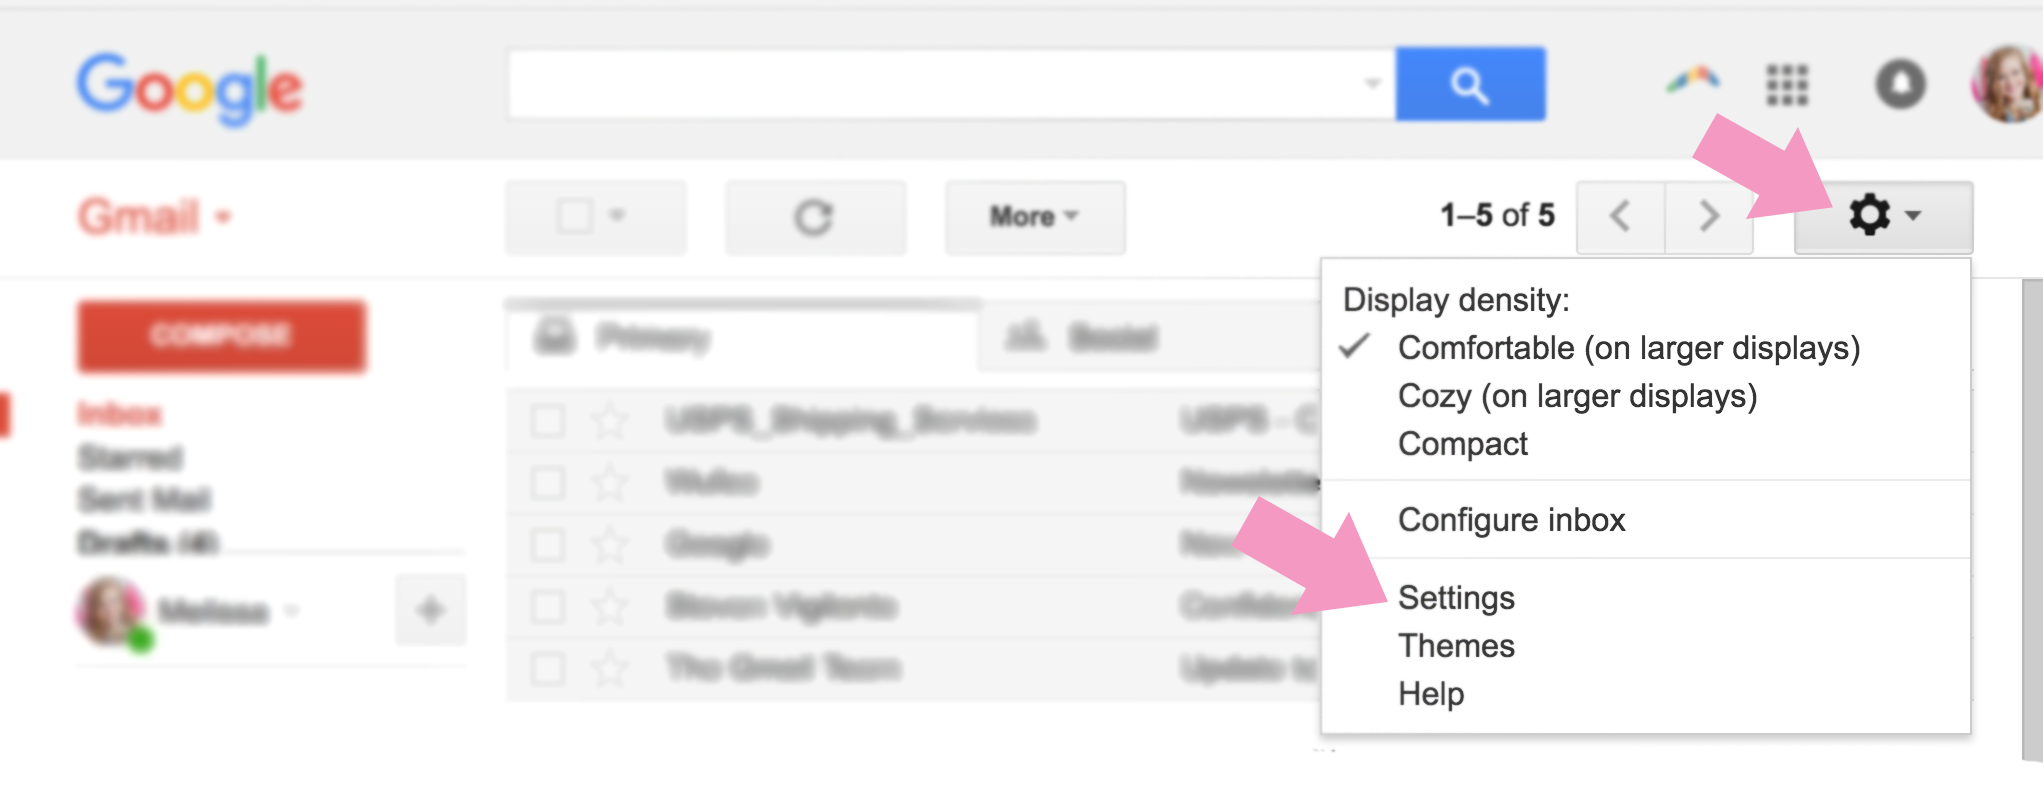
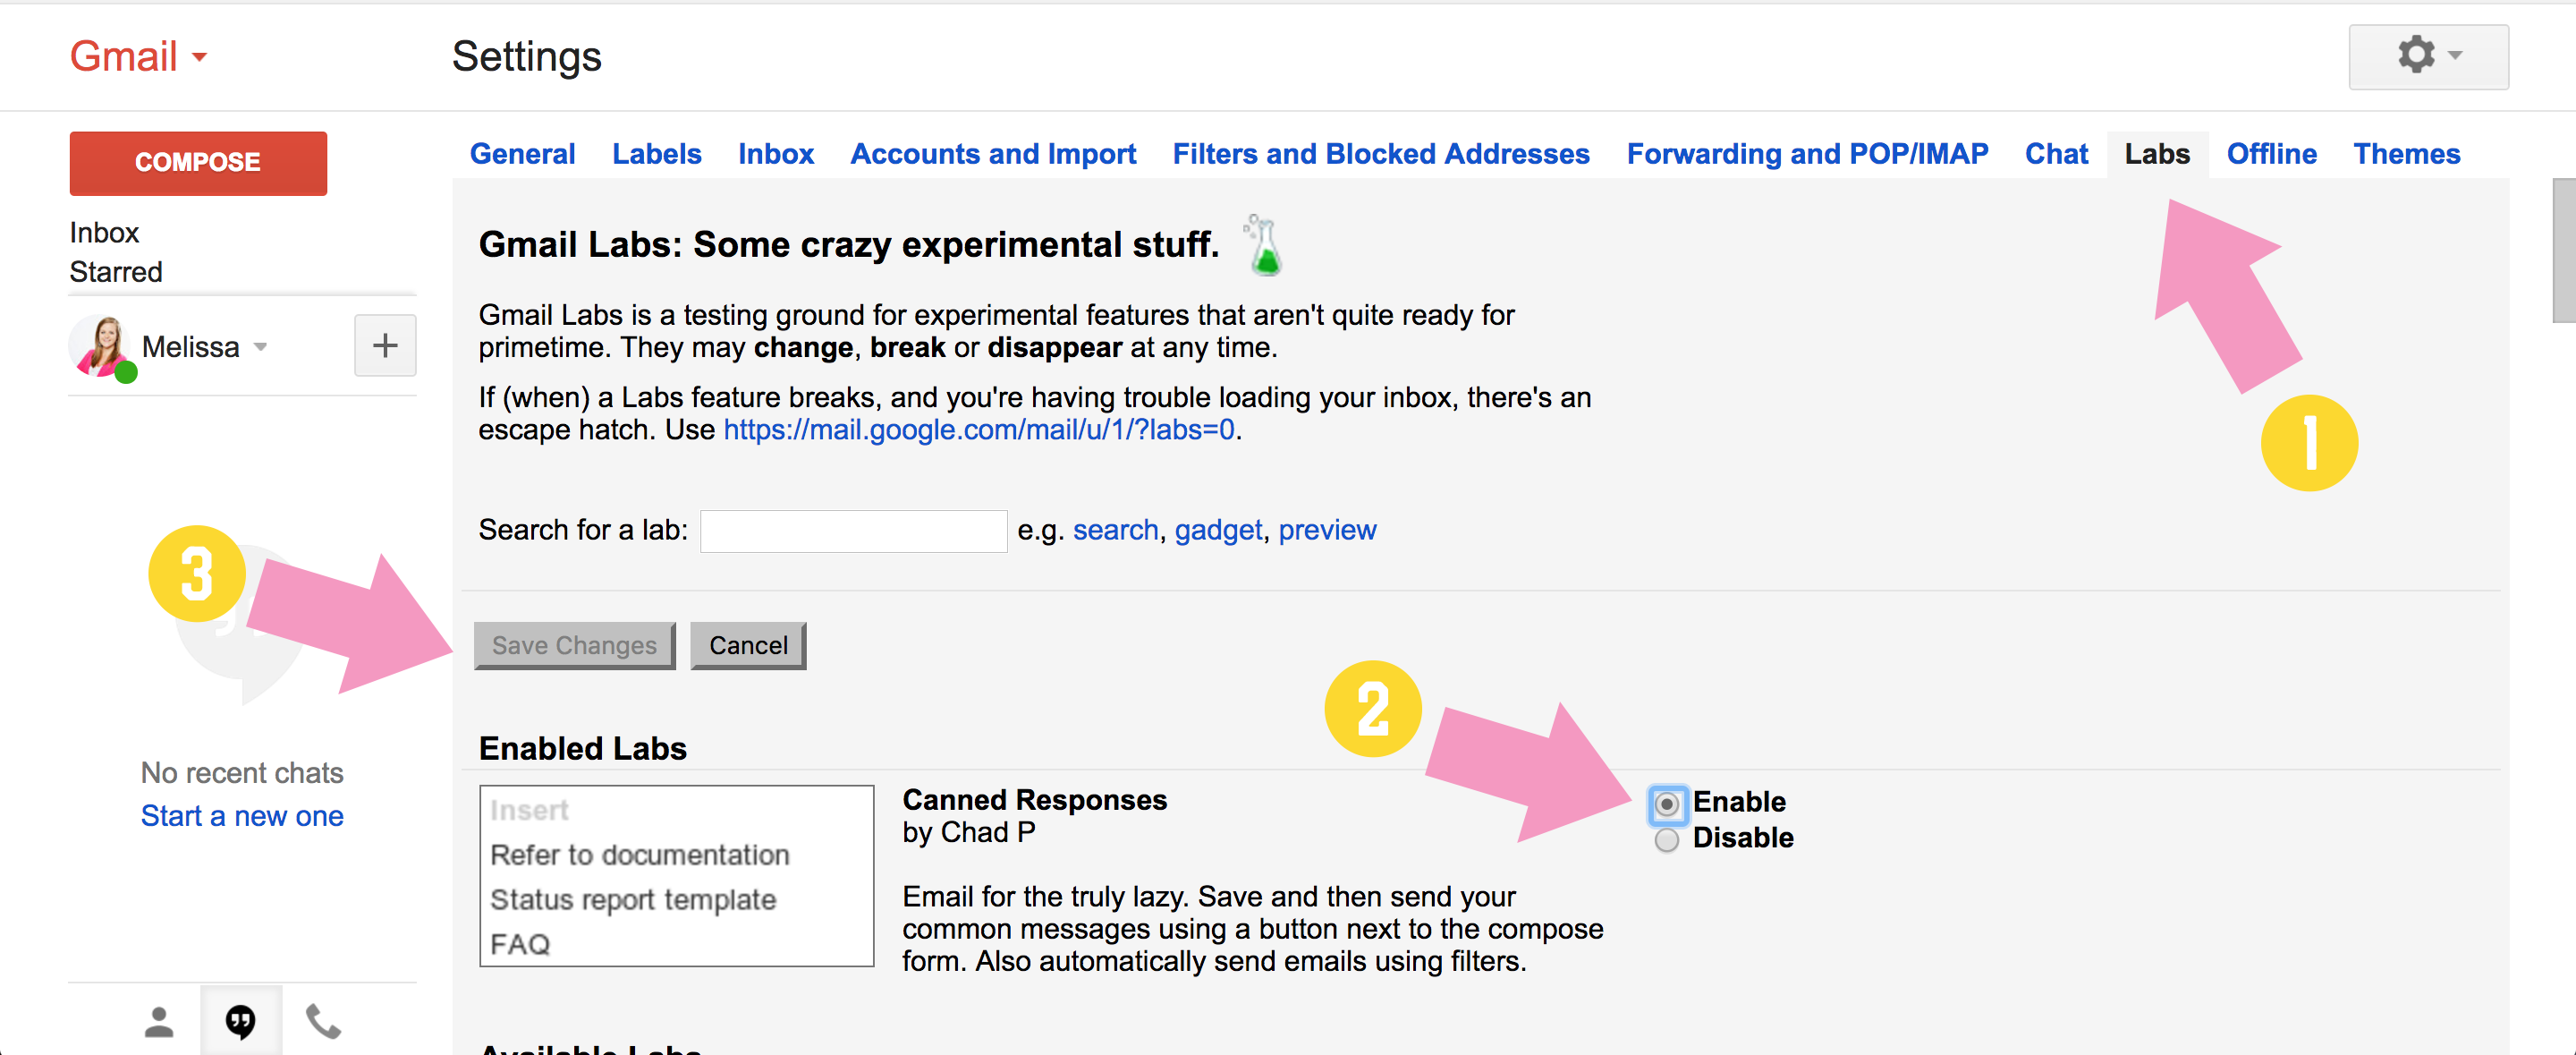
- Find the “Lab” tab and scroll down to where it says “Canned Responses”. Click “Enable” and then scroll up and click “Save Changes”
Now that canned responses are Enabled in your account (yay!), it’s time to start composing those emails!
- Open a new email and compose your email.
2. Once finished writing, click on the bottom right corner and click “Save > New Canned Response”. It will prompt you to create a name for this exact response. Note that it does not save subject lines, but you can list that on the top of your email for quick copy & pasting.
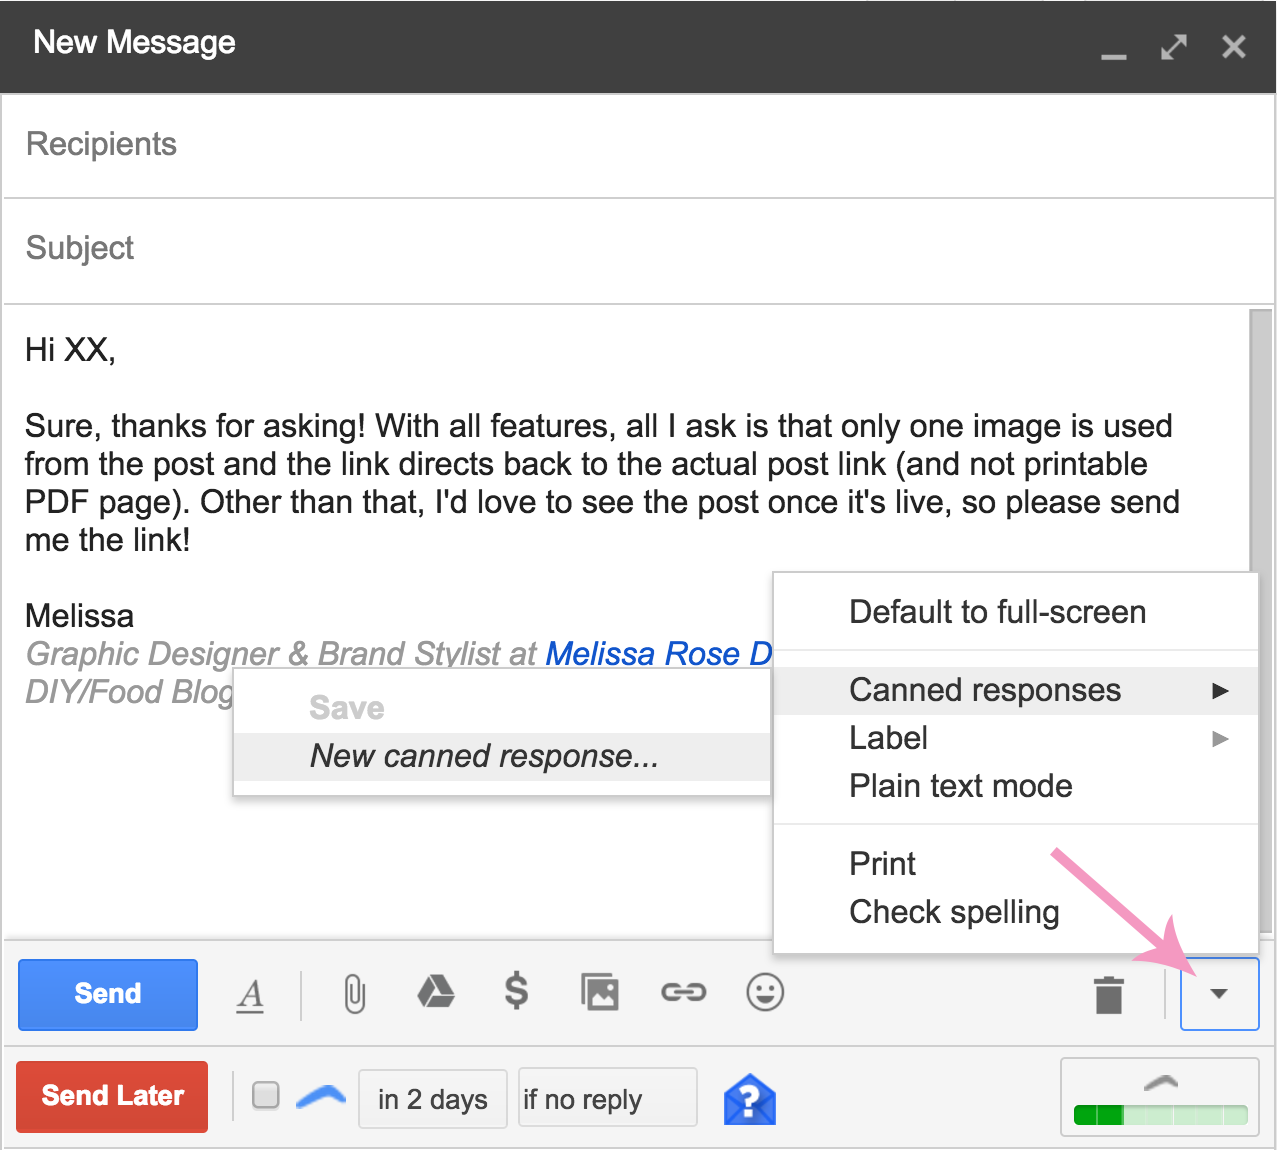
- Note: if you already have an email signature setup in gmail, don’t include it in your canned response or you will end up with 2 signatures and have to delete one for each new email you create.
Wahoo! You just created your first canned response. Now let’s walk through how to use it!
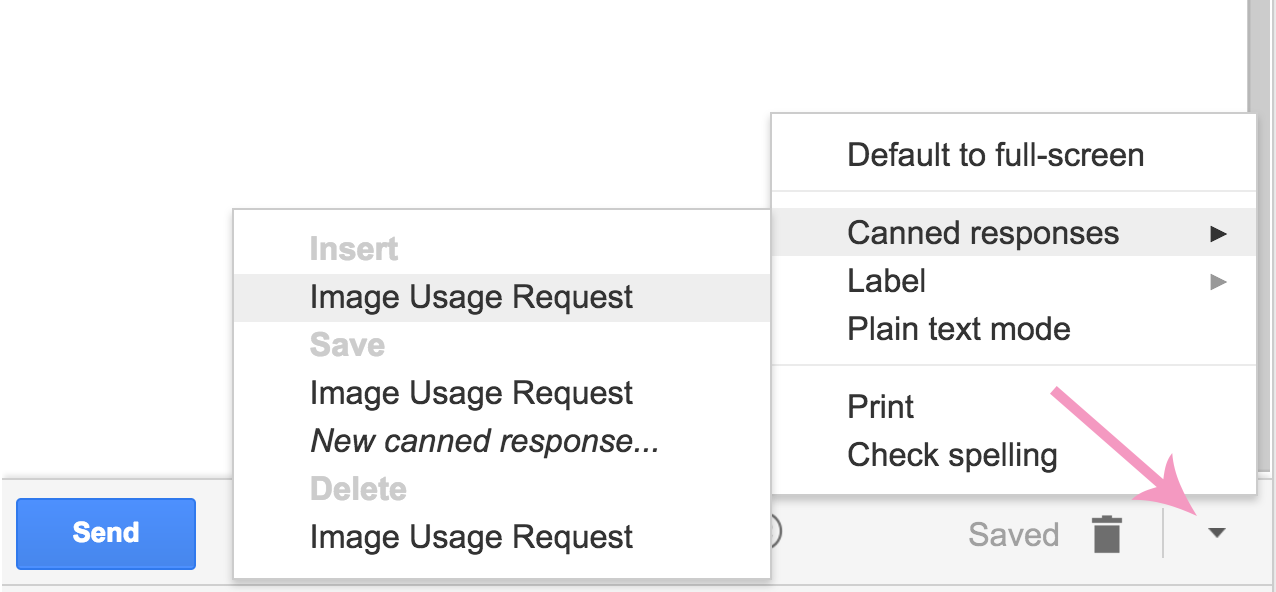
- Start A New Email
- Click The Bottom Arrow > Canned Responses > Insert “_______”.
A few things to note:
- If you ever want to change a canned response, simply change the wording and click “Save > The Exact Canned Response” This will update the response.
- When inserting responses, be sure you are clicking on “Insert” and not “Save”. I’ve accidentally overwritten responses by saving over ones because I hit save and not insert.
- Always be sure to customize your email to your recipients name and personalize the message to them! Canned responses should streamline your workflow but shouldn’t make you sound like a robot. For example, if a brand reaches out be sure to acknowledge the partnership. Instead of just responding with the media kit, personalize the message to their product. I always like to give rough ideas on content to show creative ways to work together.
Example: “I’d love to chat more about featuring (insert brand name) in an upcoming post. I’m actually working on a 5 post recipe series this summer on Healthy Smoothies and would love to chat more about how we could integrate your low-fat options into the recipes. “
[line]
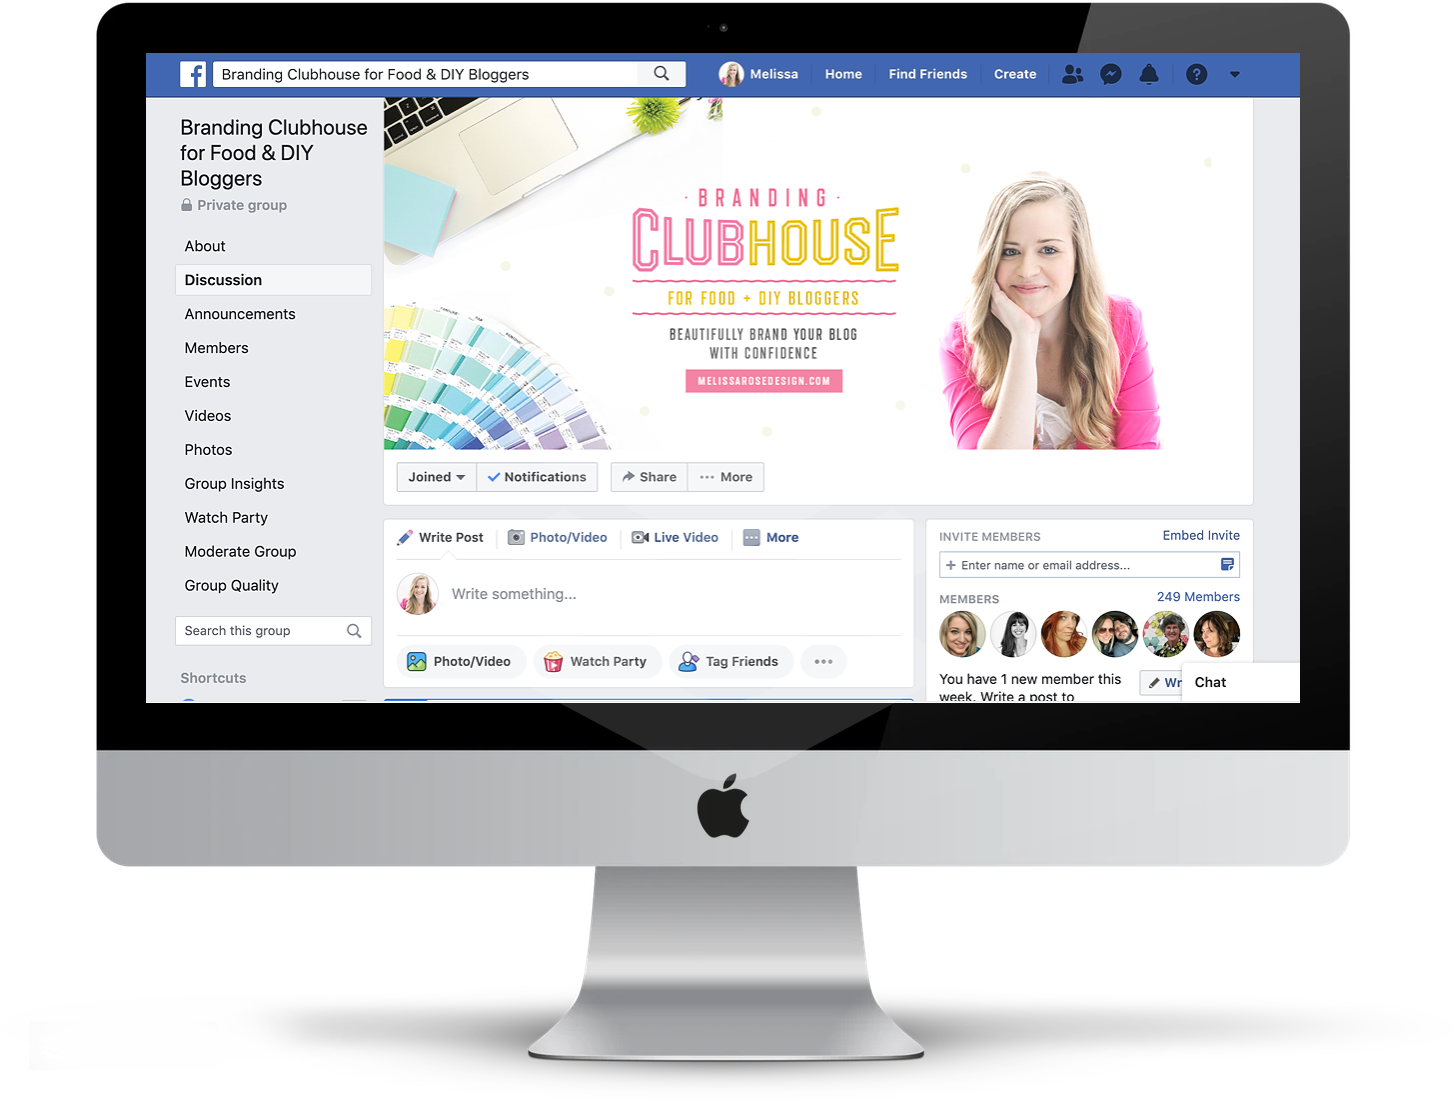
OH, AND HEY! DID YOU KNOW I HAD A FREE FACEBOOK GROUP?
If you want to hang out with me other Food & DIY bloggers, make sure to click here to join my FREE private Facebook group.
[line]
Share on Social