It’s no secret that as bloggers we feel pressure to constantly be cranking out new content. Because more content equals more traffic and more traffic means more ad revenue. (And more ad revenue means we can buy ourselves more cupcakes…) But what if there was a way to get more traffic by using what we’ve already created? To repurpose blog content in a way that helped us work smarter, not harder?
As my design studio grows and my time is split between client sites and my Food & DIY blog, I’ve been thinking about this a lot lately. How can I market what I’ve already invested time into and make it passively work for me?
So today I wanted to share 8 ways you can repurpose your blog content to not only drive traffic to your site, but to also help ease the burden of having to constantly create new recipes & projects.
1. Create A Video Based Off A Viral Post
Have a post that went nuts on Pinterest? It doesn’t matter if you posted it 2 years ago or 2 weeks ago, it probably still has relevance today. With video becoming such an integral part to blogging and content creation, quick step-by-step recipe and DIY videos are a great way to not only engage your audience but also drive additional traffic to your blog posts through social media.
2. Create A Pinnable Graphic For High Performing Posts
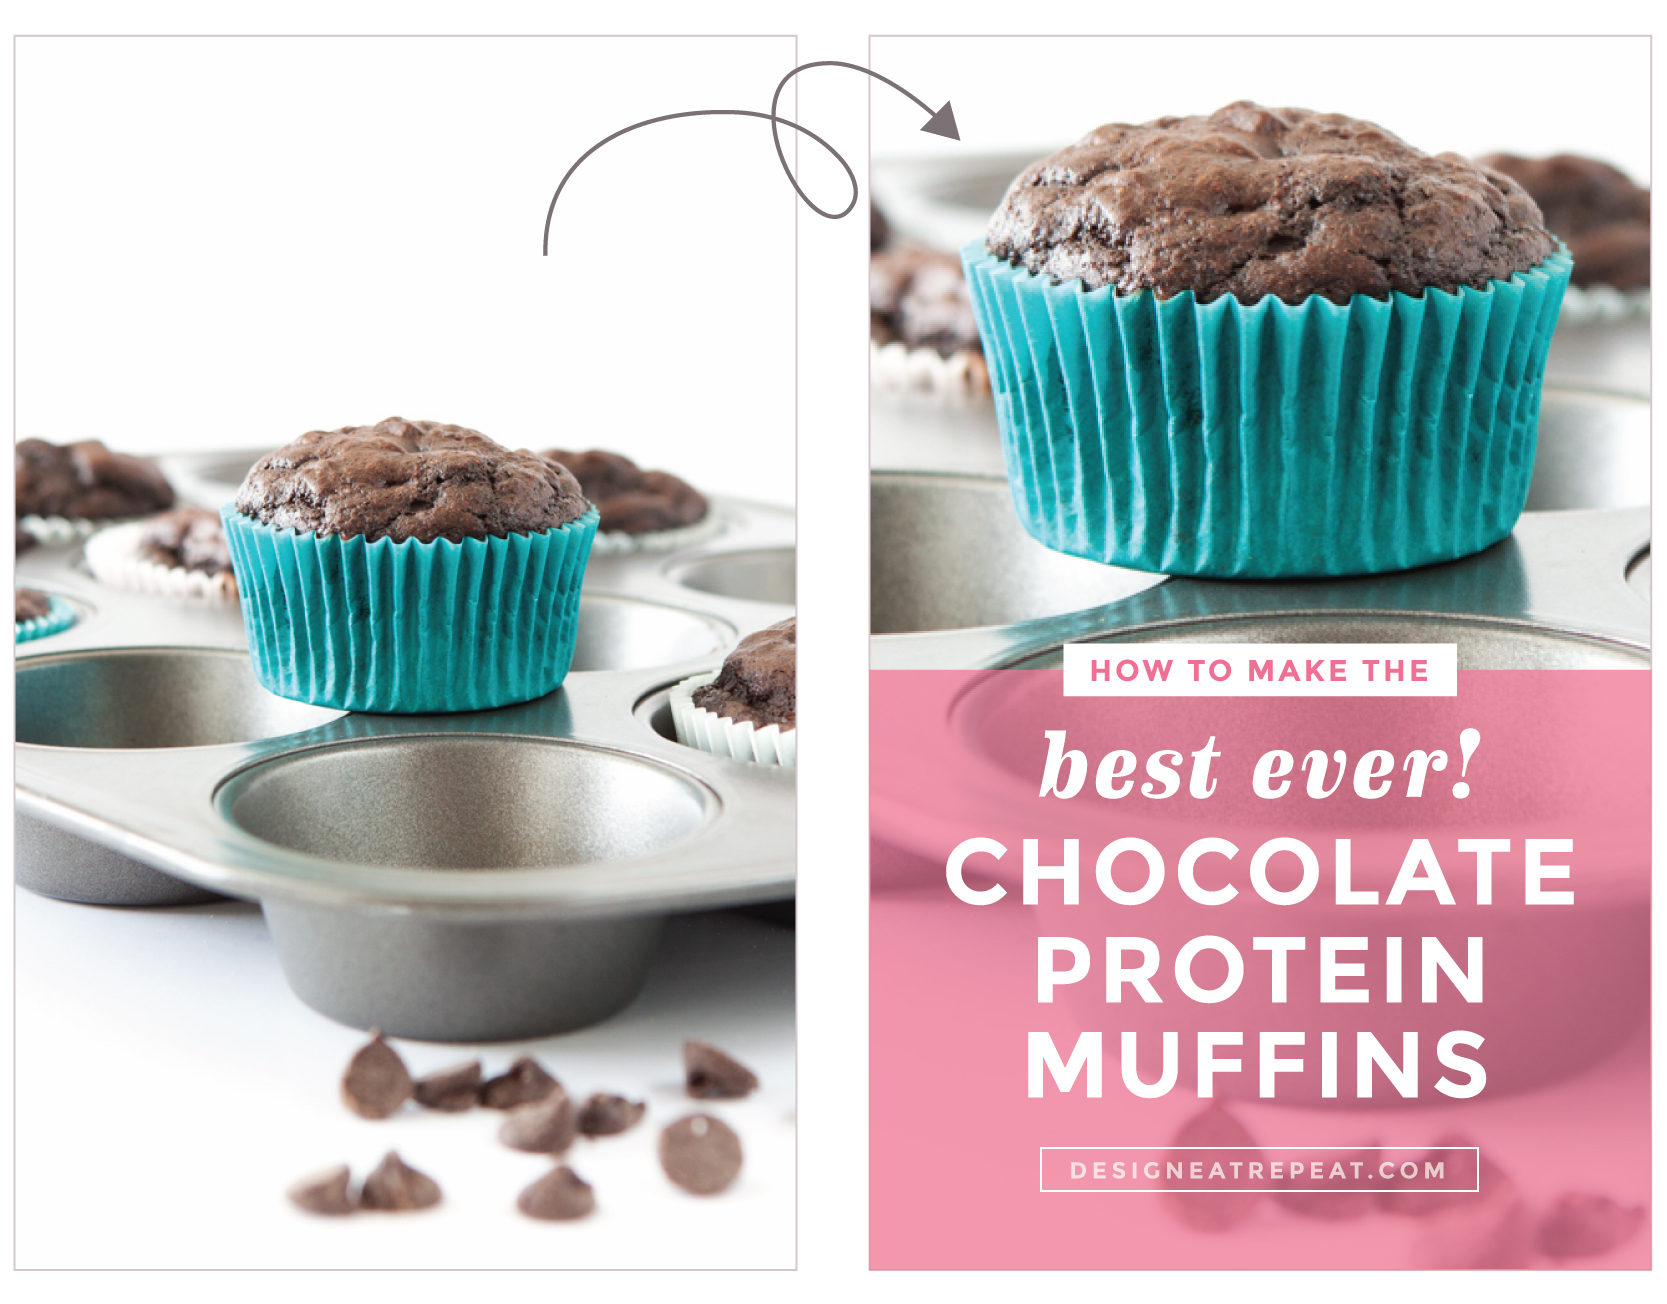
One of my least favorite parts of blogging is having to constantly promote the posts. I’ll often hit publish, submit it to Foodgawker, announce it a few times on social media, and then move on to the next more fun, exciting project. But one of my goals for 2017 is to go back, figure out my top 10 posts, and then create new and engaging pinnable graphics for them. Now when someone goes to pin those popular posts, it will not only contain the plain images that have proven to convert but it will also have a new text-based collage to attract new eyes. Check out how much more “pinnable” the one below is when text is added!
And! If you don’t want the new collage to disrupt the flow or look of your post, you can hide it in your post.
3. Add A Content Upgrade to Popular Posts
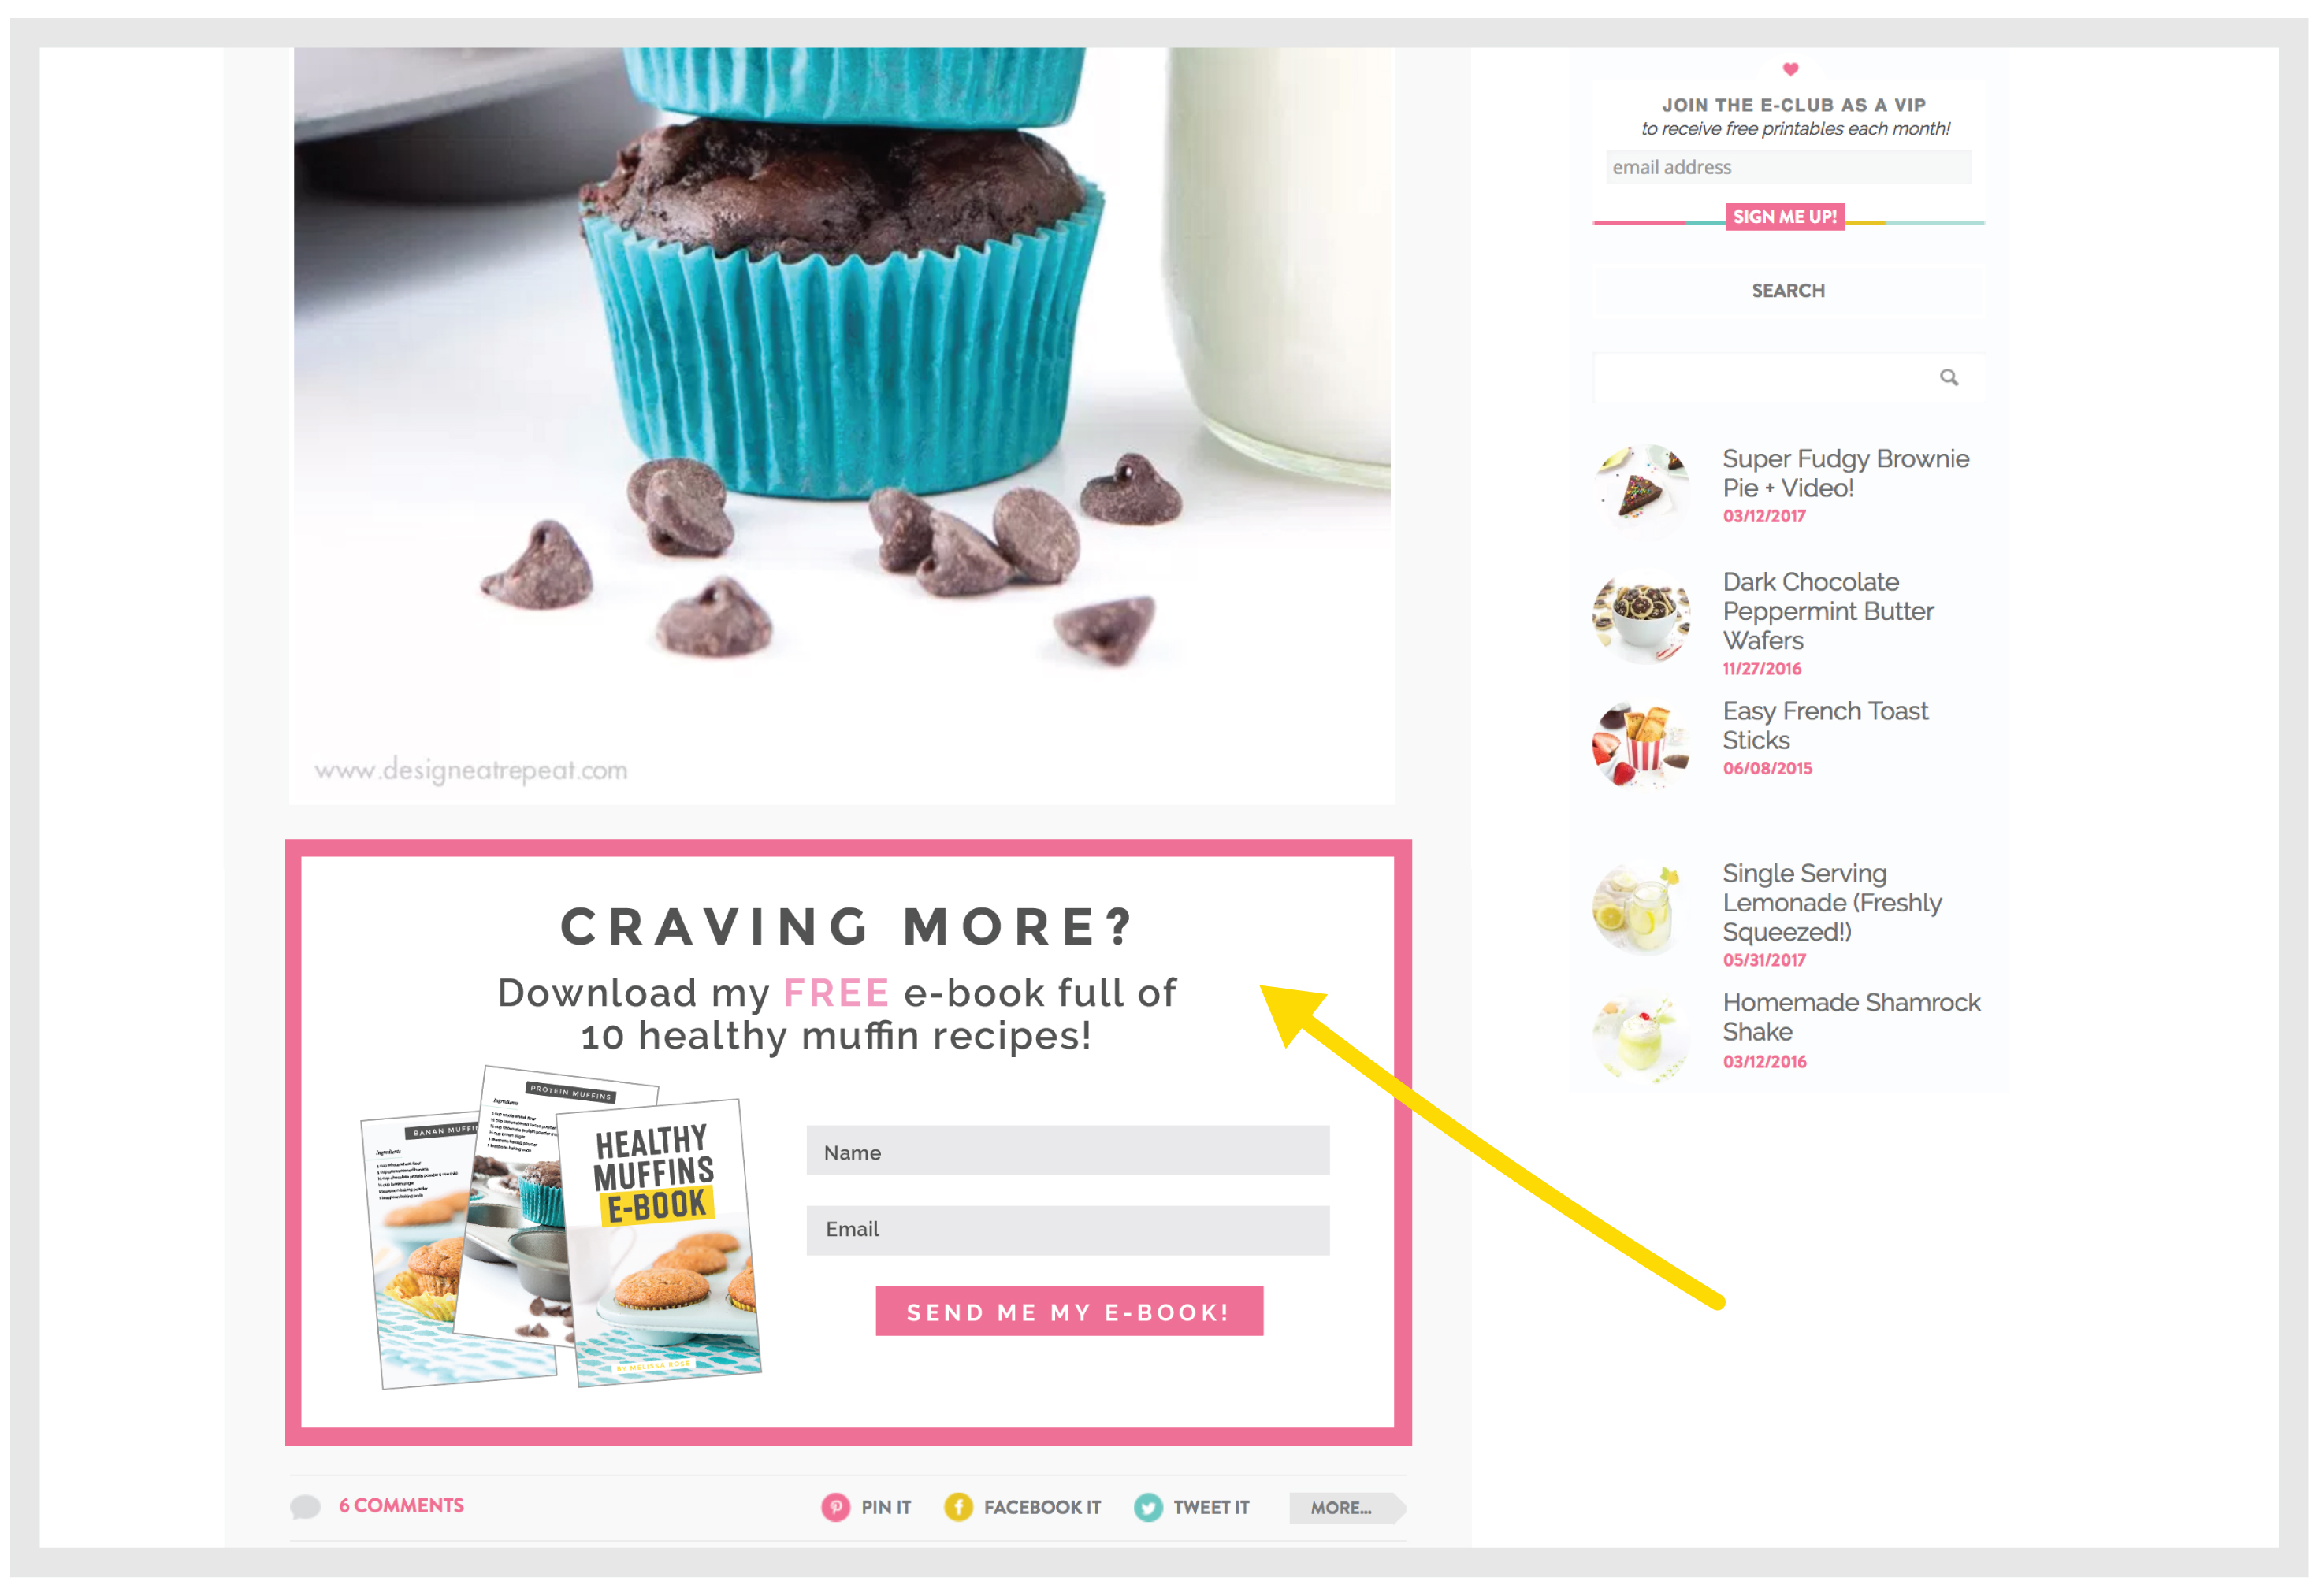
If you’re unfamiliar with content upgrades, they are essentially something you offer to your readers (for free) at the end of your posts to get them to sign up for your email list. So in the case of food blogging, you could pinpoint your top performing posts and then offer them some type of freebie if they sign up for your email list.
For example, a cookie blogger could take their viral sugar cookie recipe and then offer a printable royal icing cheat sheet, a printable cookie template, or even a free e-book of their “Top 5 Birthday Cookie Designs” at the end of the post.
A craft blogger could take a viral DIY project about a teacher gift and offer a free gift tag that their readers can attach. Or even offer a free PDF of “5 Printable Teacher Gift Ideas.”
You get the idea. If your site is niched down, this freebie can be the same for all the posts you add it to. Or if you have several viral posts that fall in different categories, maybe you create two separate freebies that will entice the audience those posts are attracting.
Whatever you do, keep it simple. Remember, the point of this is to work smarter so don’t get caught up in spending hours creating a huge & extensive freebie. If you are creating something that is valuable and aligns with your brand’s niche, it will be a no-brainer that your readers will want to scoop up that freebie as soon as they get finished reading your post.
The one thing I do want to mention is that whatever posts you repurpose, you want them to be in line with your brand’s goals and match up with the direction you are headed (if you don’t have a clear idea, I encourage you to work through my Brand Foundation Workbook first). So for example, one of my most viral posts is my favorite sugar cookie recipe. And while I plan to go back to that post and add some type of content upgrade, because I’m taking my site more in the direction of paper crafting, I don’t plan to elaborate too much on sugar cookies because long term, it’s not what I want to position myself as an expert on.
Instead, I will be going through many of my DIY projects and printables and adding content upgrades that appeal more to paper crafters so that I’m building an email list that is specific to the audience I want to serve. So let’s say a year from now I want to launch a product or service for crafters, my list is already filled with people who are interested in paper crafting and would be eager to snag up a crafting product (and not full of readers who may only care about cookie decorating).
4. Combine Popular Posts into A E-Book
Piggybacking off the content upgrades, creating a e-book (free or paid) using your popular posts is a great way to recycle your proven content and promote your site beyond spitting out post links on social media. You can not only use it as an email opt-in at the end of your posts like we talked about before, but you can also create an “ad” for it and promote it on your blog’s sidebar and on Pinterest.
5. Link to Newer Posts in Older Posts
After blogging for a while, you’re naturally going to start posting similar content to what you created before. A great way to keep readers on your site is to go back into old posts and link them to the new relevant posts. So for example, let’s say you just posted a new banana muffin recipe that is a little more indulgent than the one you created 3 years ago. At the end of the old post, you could write something like, “Want something a little sweeter? Check out my recipe for Chocolate Chip Banana Muffins!”.
6. Add Affiliate Links to Popular Posts
I’m in the process of redesigning my blog and one of the things I plan to do is go through old DIY & Craft posts and add more affiliate links to the materials each project requires. When I started blogging, I either didn’t link materials at all or I only linked a few things from around the web. But with the power of affiliate programs like Amazon, you can receive a small commission from recommending products you already purchase & use.
For example, one of the questions I get a lot of is what cardstock I use for my printables. So now instead of just listing “white card stock” in the materials section of the post, I can link that to the actual cardstock brand I use.
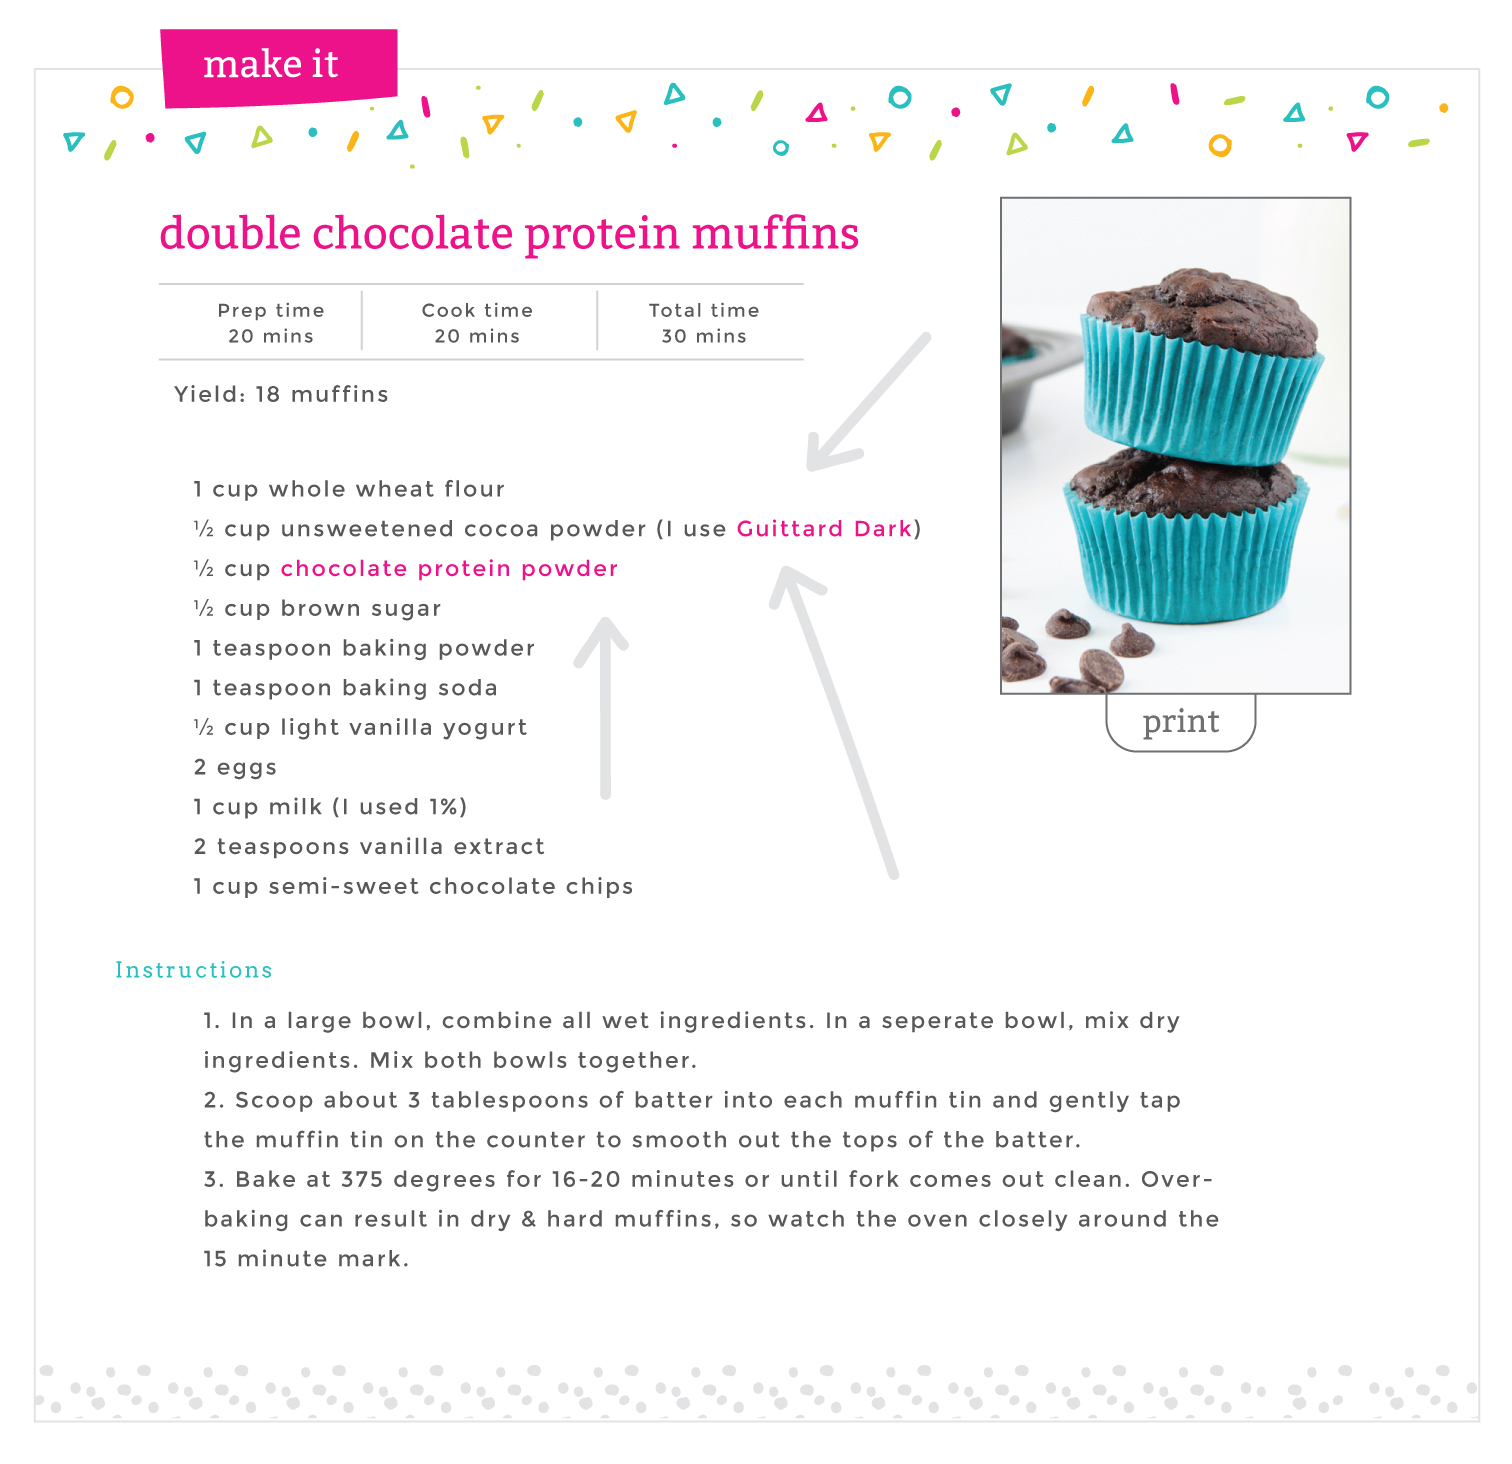
With food bloggers, this could mean that instead of just putting “cocoa powder” in your recipe’s ingredient list you can link it to the exact brand of cocoa powder you like using. For example (and maybe it’s the blogger in me), but when I come to a recipe for killer chocolate muffins, I want to know what kind of cocoa powder they used that made them so good. I appreciate it when a blogger just links to it without requiring me to scroll through the comments or email them. Now I’m not saying you should do this for every ingredient (because let’s be honest, it’s going to look spammy if you link to a box of baking soda on Amazon) but for the specialty ingredients, adding those links will help your readers best recreate your recipe.
The below is a recipe box from latest design client, Sara over at Bitz & Giggles!
7. Live Stream Yourself Demo-ing a Popular Post
I truly believe that video is the way blogging is headed and that humanizing your brand is even more important than ever before. People want to know that you are a real human behind that computer screen and video is a great way to show them your personality and expertise.
So let’s say that you have a dessert blog and your most viral post is a Chocolate Layer Cake. And before you know it, you start getting a lot of questions about how to get the frosting the perfect spreadable consistency. You could answer the same questions 10 times over or you could jump on a live video, walk through your tips and techniques, and then answer any questions your readers may have.
It will not only help build the face to your brand, but you can then repurpose that video again by adding the replay to the blog post, your blog’s FAQ page, or to your Youtube channel. So now you’ve turned that one viral post that was sitting on your site just collecting its usual traffic…into multiple traffic and brand-building streams. All without having to think of a new post idea.
8. Create a Roundup Graphic of Related Posts
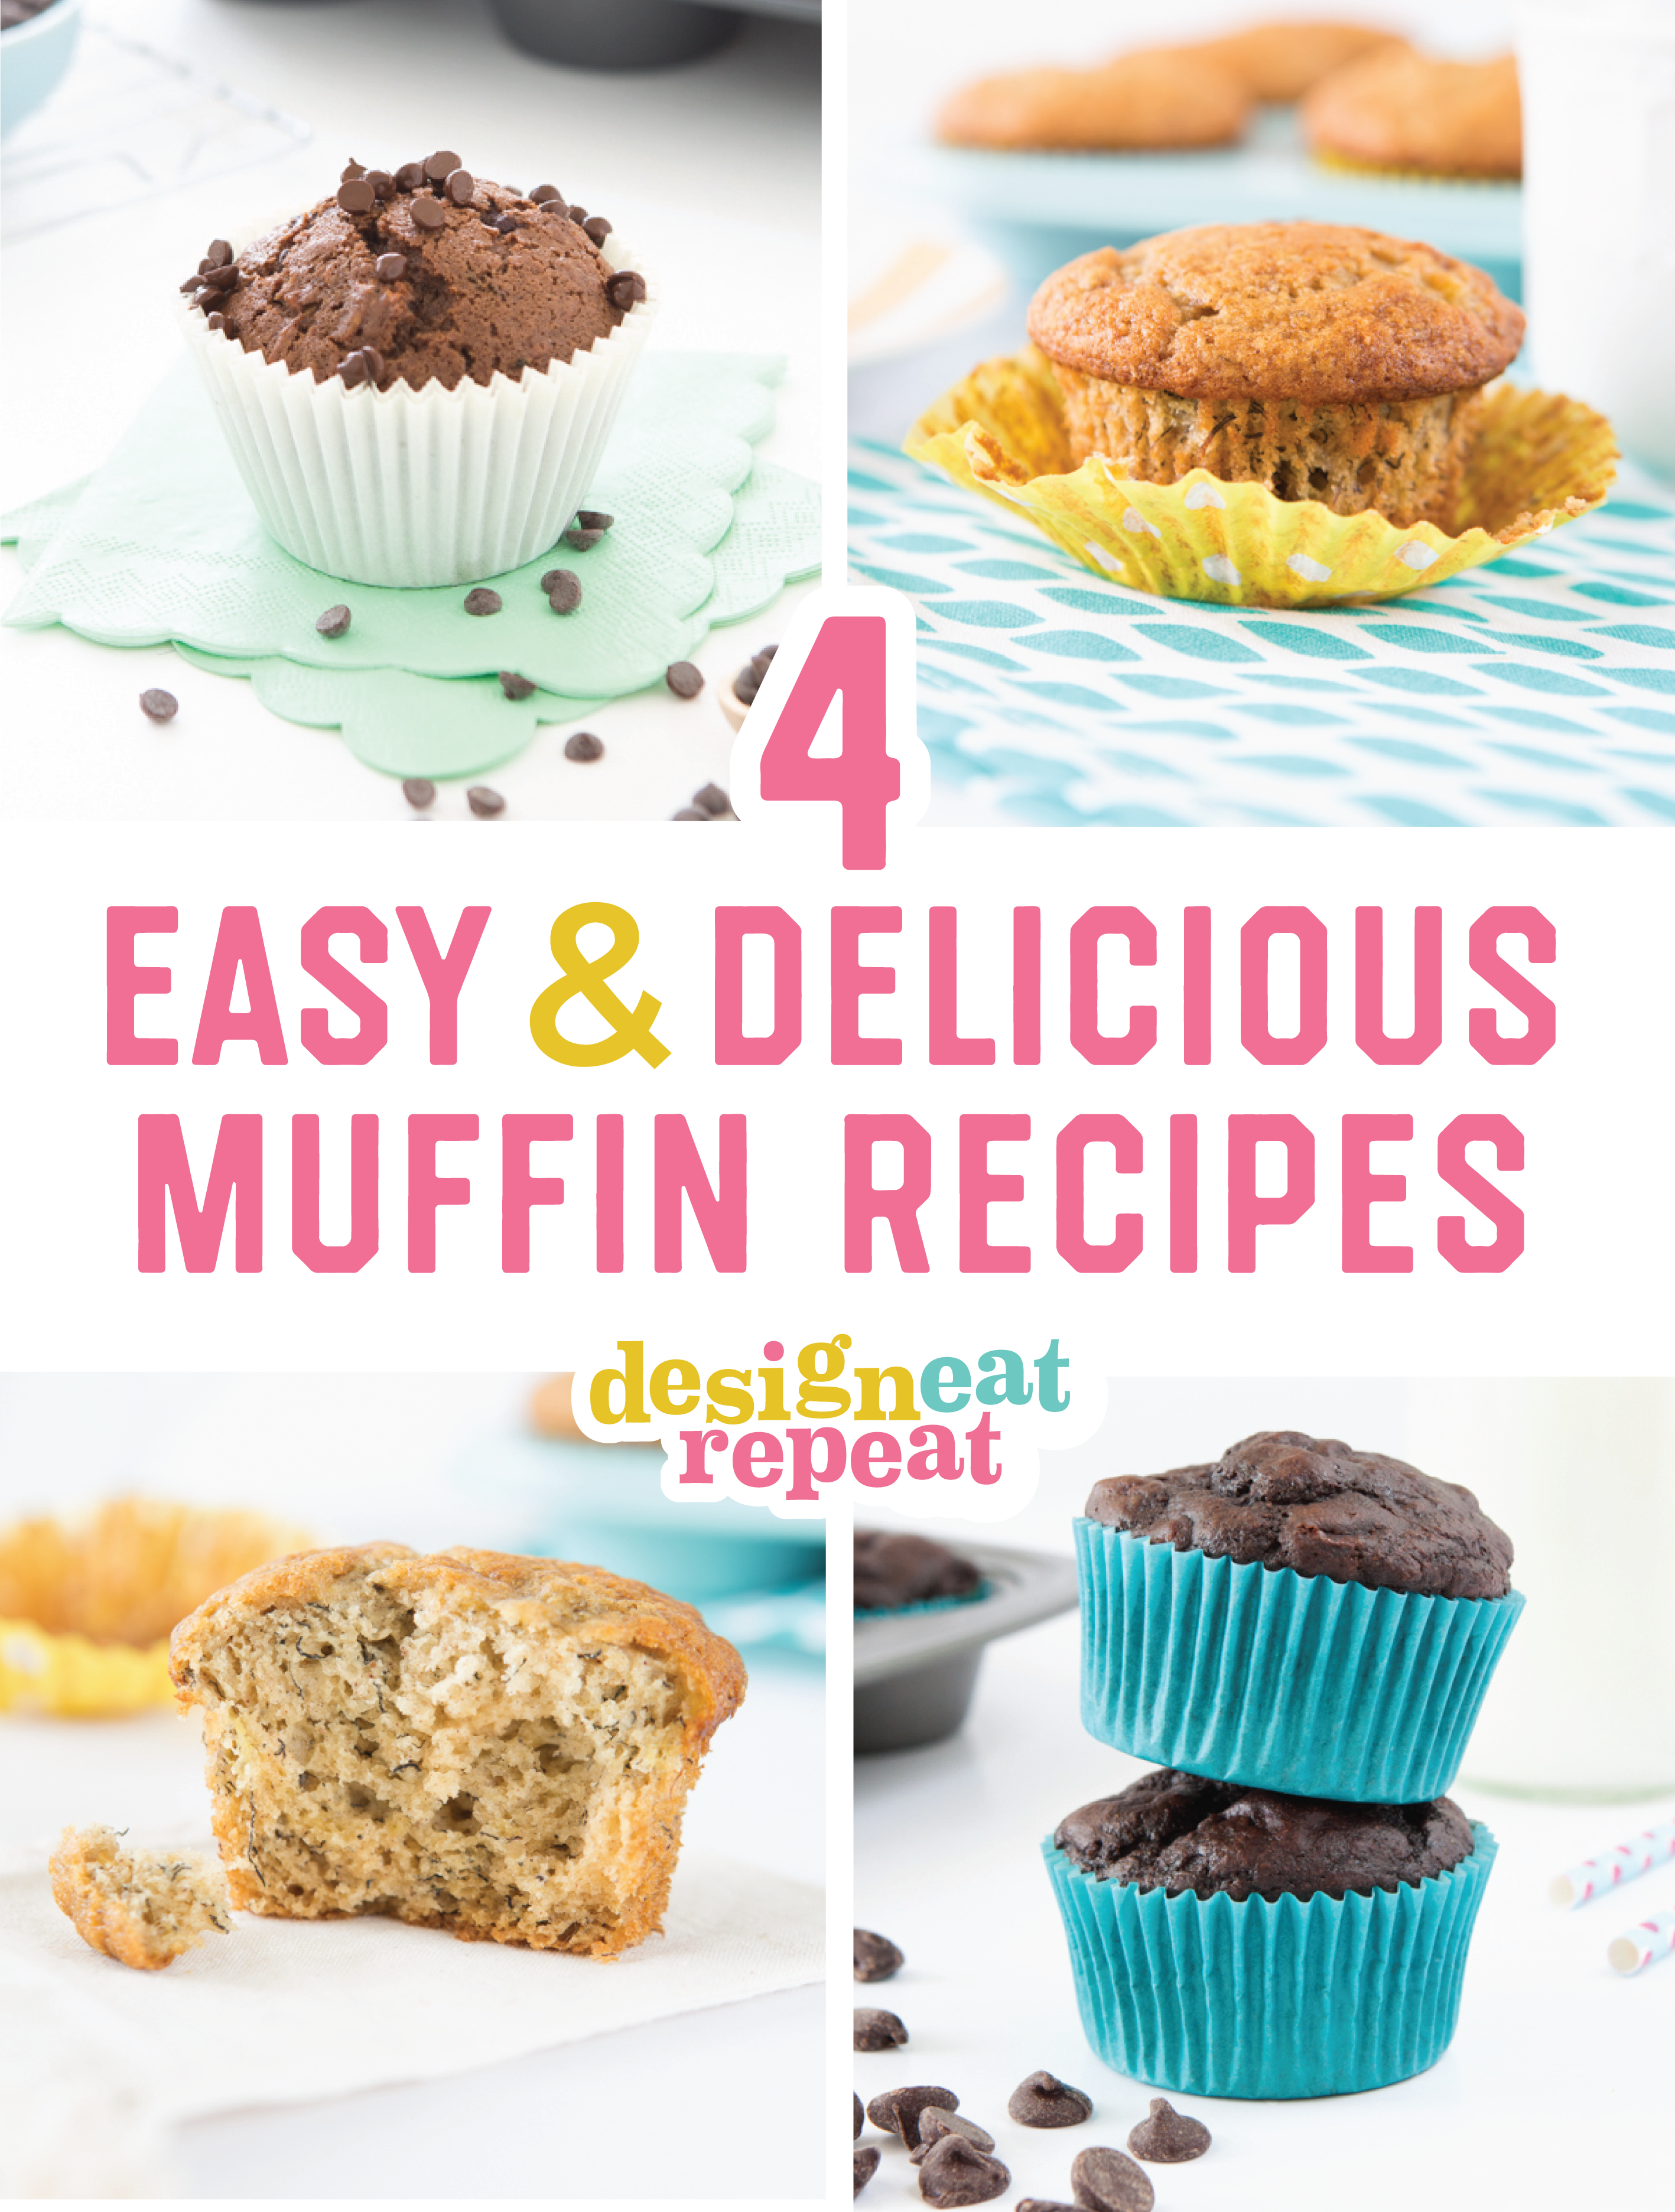
You’ve all seen the roundup posts floating around Pinterest that are something like, “10 Muffin Recipes You Must Try”. And you’ve probably noticed that a lot of them get tons of re-pins. And while most of those roundups include recipes from different sites, who says you can’t create those same roundups using your own recipes or projects? If you find yourself making similar things, think about an overarching theme they all have in common and make a roundup post of your own.
For example, I’ve created a lot of one-off printables over the years but the truth is that someone is probably not Googling the exact terms, “Watermelon Ice Cream Cone Wrappers” when they’re planning to throw a summer birthday party. But what they are probably searching is something like “Free Summer Printables”.
So by creating a round up graphic & post with my favorite “8 Summer Printables”, I not only got new traffic & SEO for that new search term (aka. almost 8,000 pins!), but I’m also driving traffic to those individual 8 posts at the same time. Double win.
Whew, oh whew! That was a long one – are you still with me? Like I said earlier, my personal goal in 2017 is to work smarter and by implementing more of these techniques, I hope to grow my site without having to constantly churn out new content.
In the comments below, I’d love to know if you currently implement any of these tricks OR if there’s one you want to start implementing!

Share on Social