
In my early days of blogging before I used Lightroom I would manually place my watermark on each individual blog image in Photoshop. And each time I’d do so, I would have to dig through my millions of computer files to find the logo file before placing it onto each image. Then when I started using Lightroom, I discovered a life changing feature that automatically applies a watermark to the SAME spot in each image, every time. So today I’m going to walk through the simple steps to create both a text or logo watermark in Lightroom for your blog images!
To get started, open Lightroom and in the top left corner click on the “Lightroom” tab and scroll down to “Edit Watermarks”. (If you’re on a PC, you will find the “Edit Watermarks” under the “Edit” tab.
A dialogue box will appear which is where you can customize the text, fonts, and sizing. For a text watermark, you will select the text option in the top right of the screen and then type in the text you would like to use. For a graphic watermark, you will want to use a transparent .PNG file of your logo so that there is no background when placed on your photo.
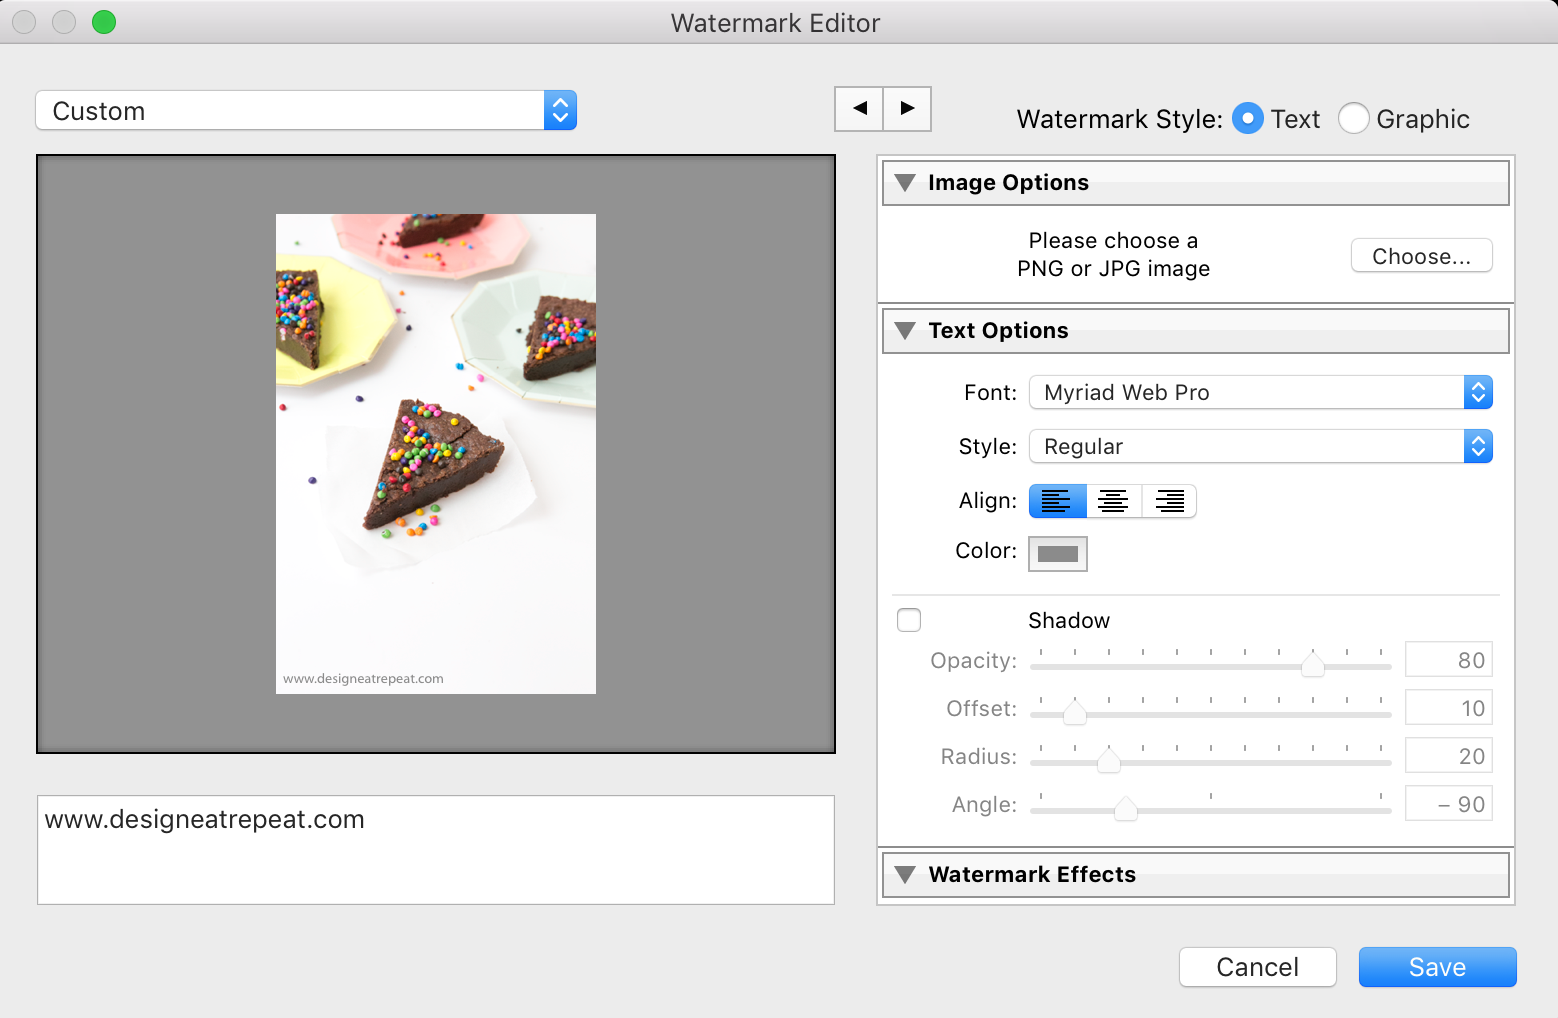

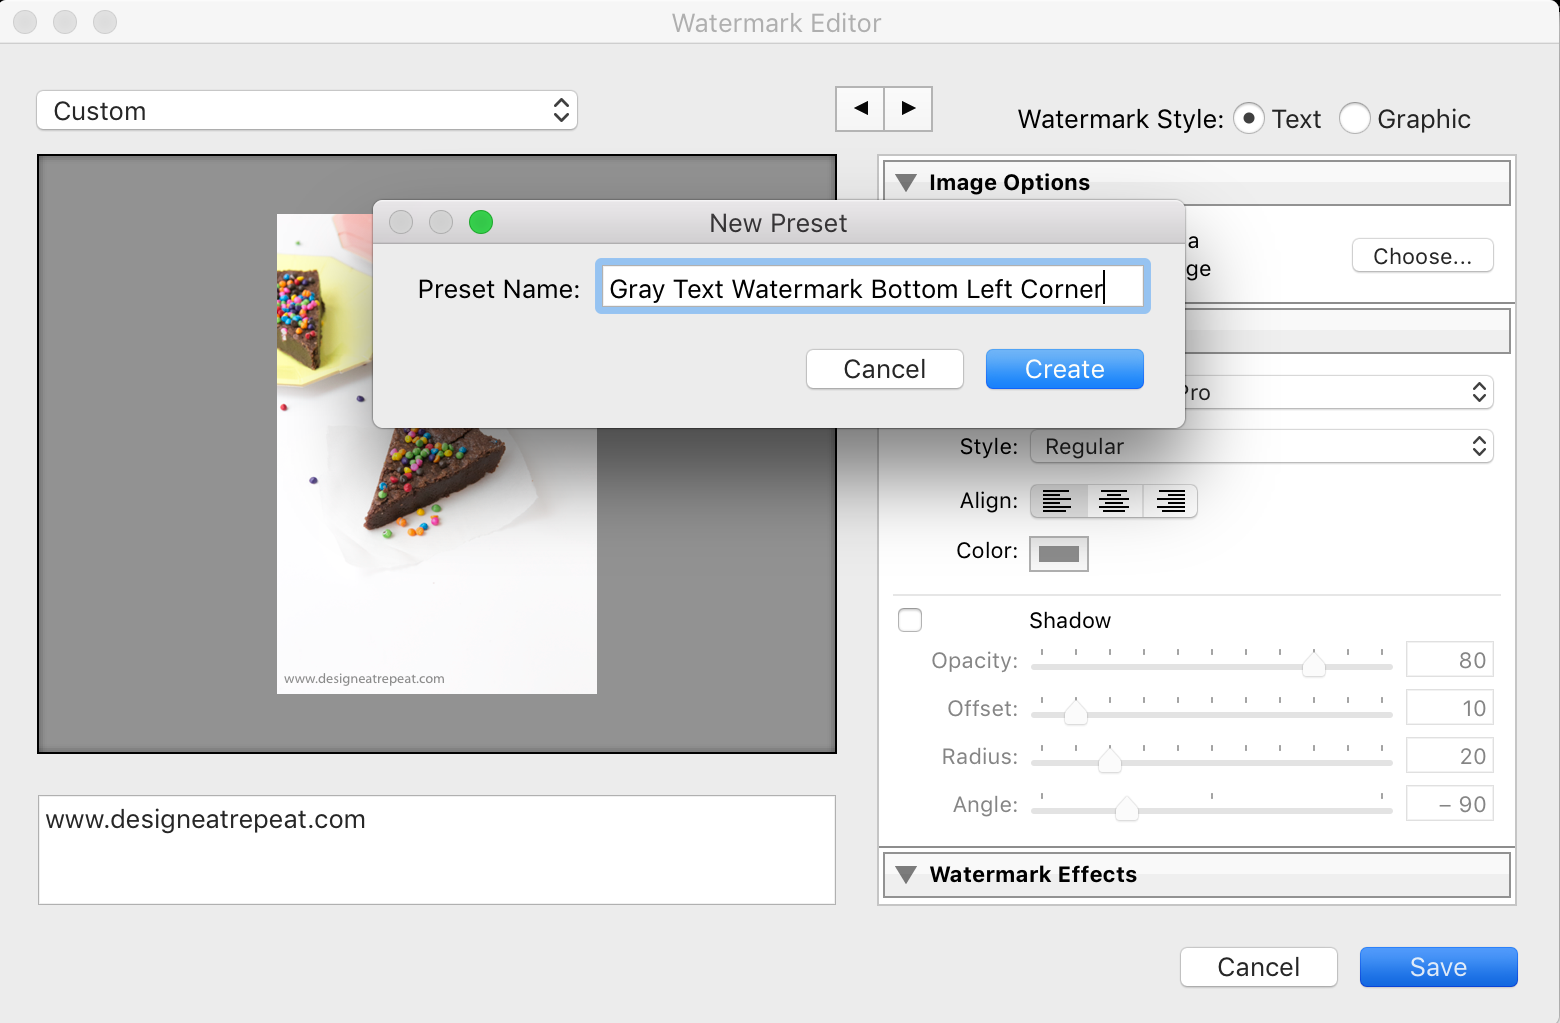
With the text option, you can adjust the font color, opacity, and can even “anchor” it to different corners of the image. Once you are happy with the design and placement, hit “Save” and it will let you name the watermark file. I like to create 4 different watermark presets for each corner of the image so that if one corner is obstructed, I can quickly place the watermark in a different corner. Because of that, I’ll name each watermark file different so that I easily know where it will go.
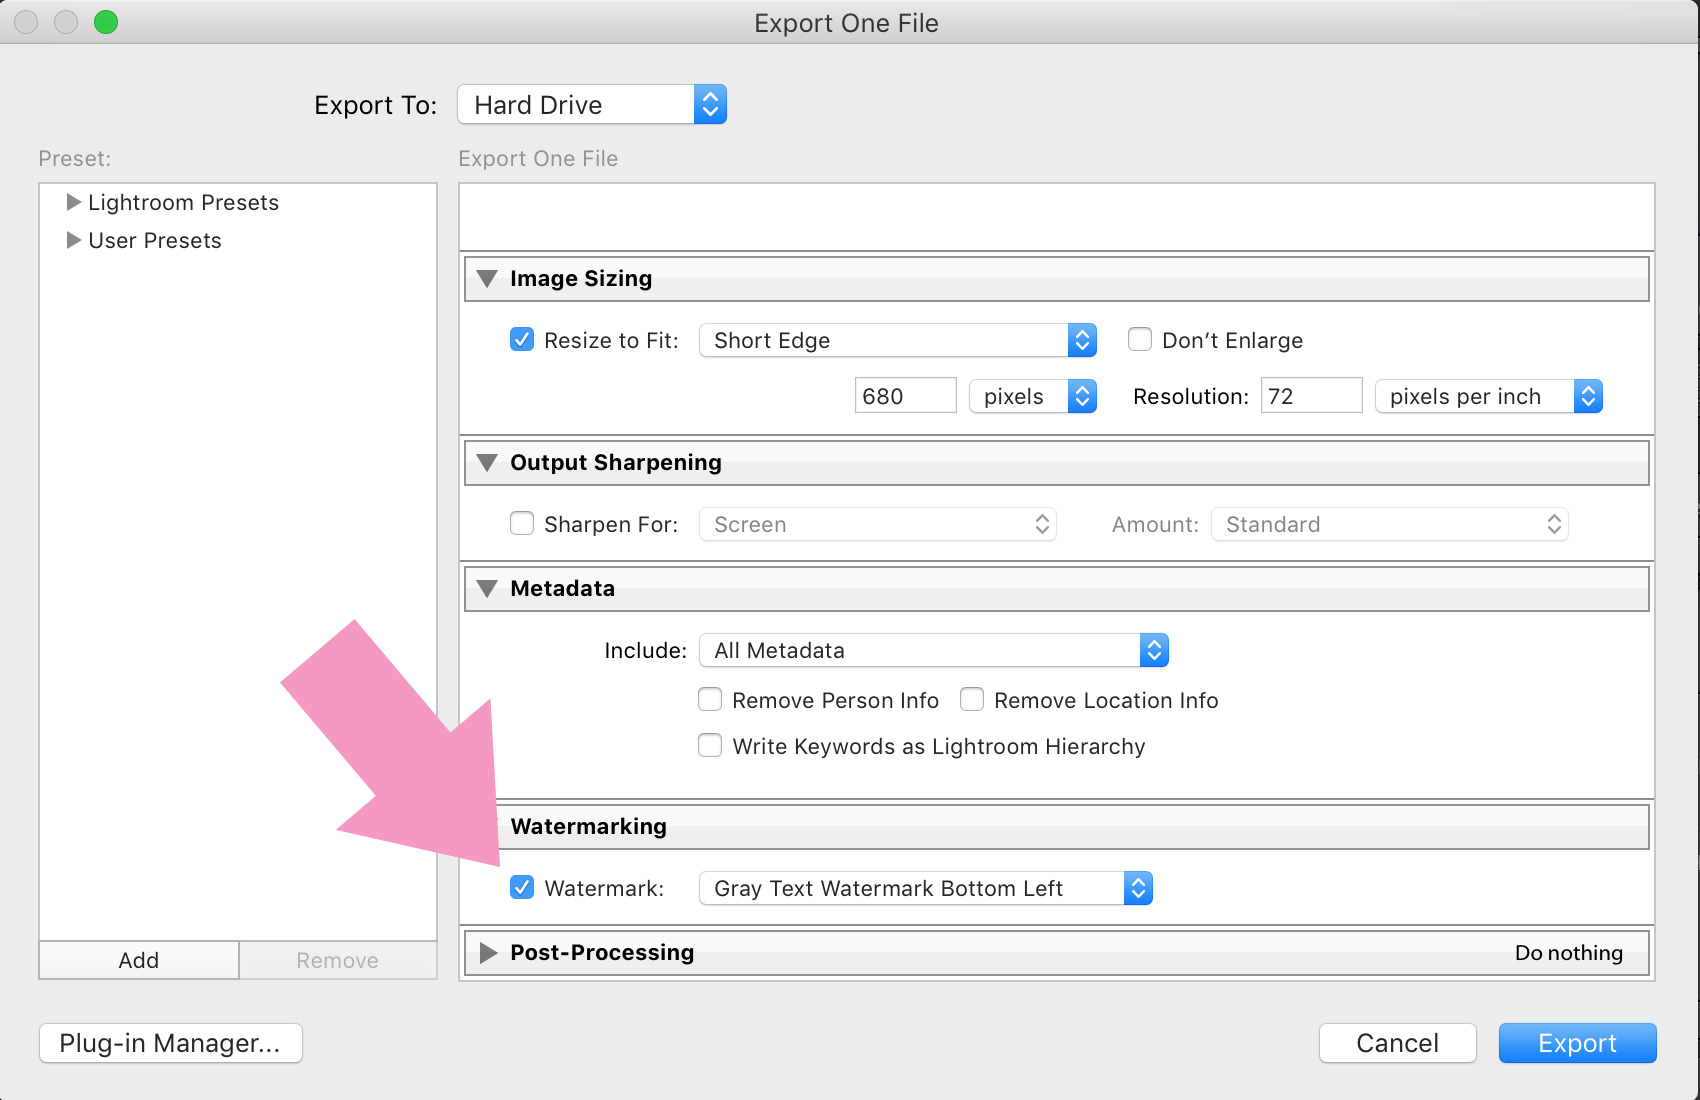
Once you’re finished creating all your watermarks, it’s time to add them to your photos! After you’re finished editing your photos, simply right click on the images you want to export and add the watermarks to by going to Export > Export… > And then scroll to the bottom of the box and select the watermark you wish to apply > Then hit “Export”
Related: How to Optimize Blog Images for Site Speed
You won’t be able to preview the watermark on the image in Lightroom, but you can always adjust them if you don’t like how it looks on your image. The great thing about creating watermarks in Lightroom is that they allow you to create an unlimited amount and you don’t have to mess with placing it on each individual image.
And that’s all there is to it! Easy, huh? In the comments below, let me know if you found this post helpful and what your biggest takeaway was that you want start implementing! Have you used the Lightroom watermark feature before?
[line]
CRAVING MORE EXCLUSIVE BLOGGING TUTORIALS AND TRICKS?
If you’re a Food or DIY blogger wanting to learn how to beautifully brand your blog with confidence, come join me and over a hundred other bloggers in my FREE private Facebook group!
[line]


Share on Social